
As a fashion designer, a basic tshirt silhouette just begs me to cut it up. It's not long before I take to my older tees and slash it here, rip it there...I just don't seem to keep my tshirts in their original state for more than few wears.
The Garrott Tee is no exception...
No tee is safe when I'm with scissors!
Many of you may wonder just how some of us girls achieve the perfectly disheveled slashed up tees we wear around town with such natural nonchalance. While many others know exactly how we go about getting that wide neckline, slouchy fit, total Do-It-Yourself style.
This post is NOT for those ladies that know what I'm talking about...no no, this is for the non-patternmakers, the ones not schooled in the fashion trade, those that have a couple of tshirts lying around that they just want to unleash some wrath on.
(or say, a insanely oversized vintage concert tee, the perfect specimen for a little DIY cutting!)
Here we go ladies...a quick tutorial in how to cut your tshirt!
-How to Make a Wide Open Neckline-
1. Start with a basic tshirt;
(I prefer one slightly oversized, it lends itself to a nice slouchy effect when finished)
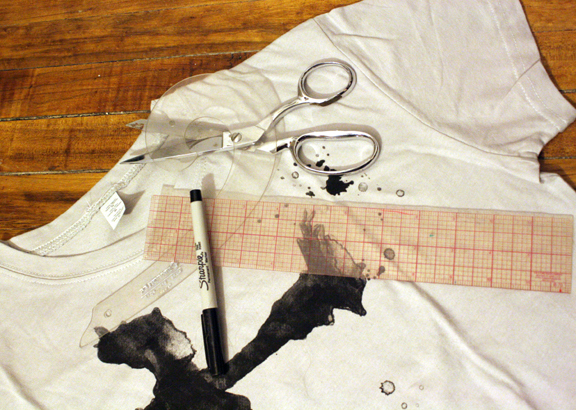
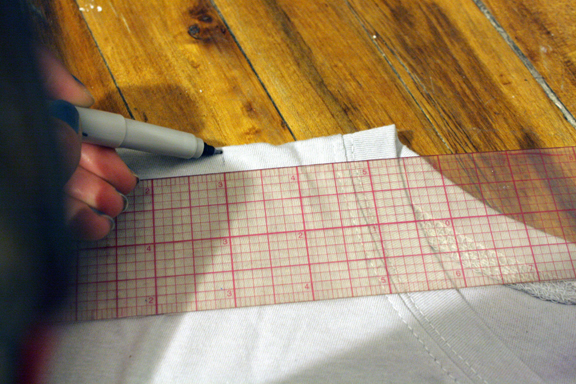
2. Get out your supplies, you'll need scissors, a ruler, and a writing utensil.
(if you've got a French Curve, all the better)
3. Measure the shoulders on each side
(sometimes tshirt, especially after many washings, become wonky and not symmetric.)
Make sure they're a similar length; if not you'll have to do some fudging of measurements
4. Once both shoulders are measured and its determined they're about the same length, decide how open you're going to want your neckline.
(It's best to go with a slightly open neck, as you can go wider and wider later on, but you can never go back to less wide once cut.)
I tend to start with a 2 to 2-1/2" wider neckline on each side
(making the neck essentially 5" wider total when finished)
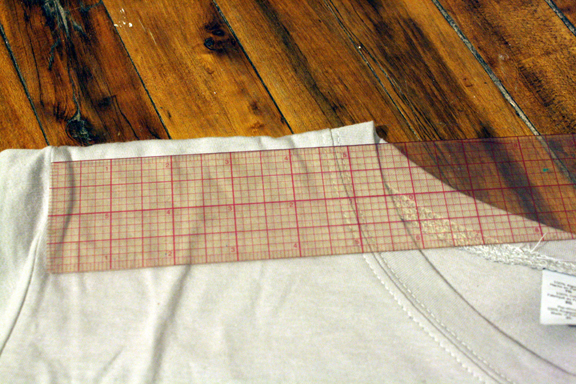
Mark the shoulder your desired measurement over from neckline opening
(shown here, I've gone 2-1/2" wider-measured over from shoulder/neck point)
Do this on both right and left shoulder.
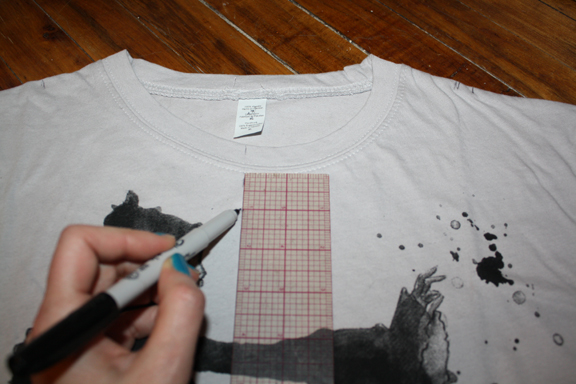
5. Next, find the center front neck point.
To do this, lay your ruler at shoulder/neck points and take half that measurement--that's your center front neck.

6. Now that you found your center front neck, determine how low you want the center neck to be...this is called your Neck Drop. Measure down center front neck and mark the lowest point you want your neck drop to be.
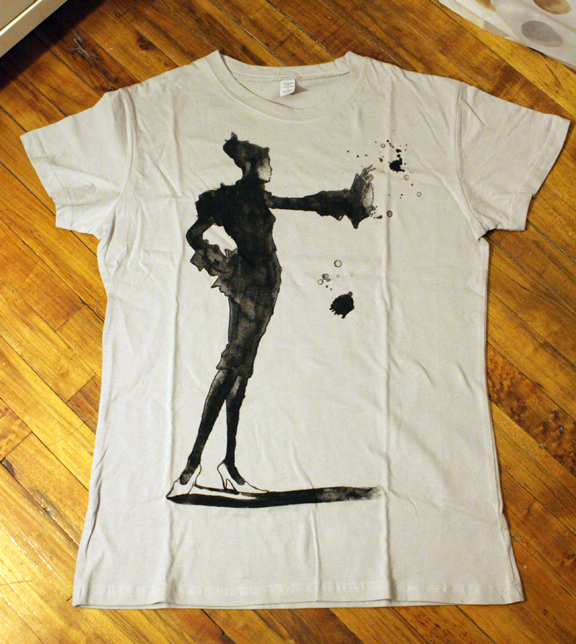
(I've determined about 1-1/2" is a good neck drop for this tee--I didn't want to cut into the graphics of the tee)
7. Now, following the curve of original neckline, draw your new neckline connecting shoulder mark to center front neck drop mark.
(This is where your french curve can come in handy-but if you don't have a french curve, you can just eyeball it.)
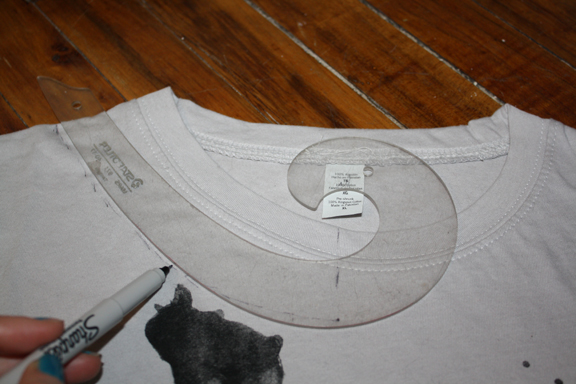
It'll look something like below:
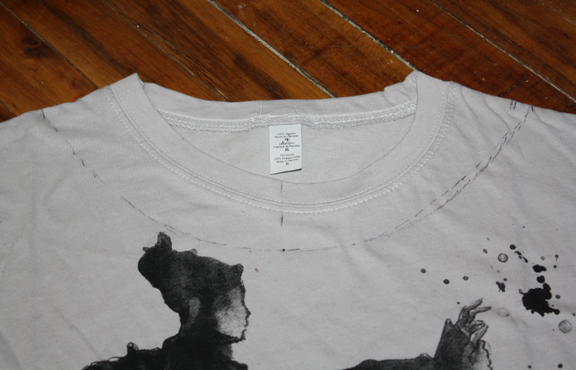
8. Now cut along this new neckline
(I prefer to cut just slightly below my drawn line so that I don't have any marker lines left on my tshirt when finished)
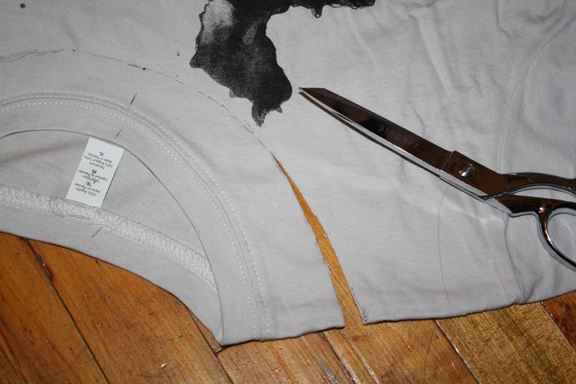
It should look something like below:
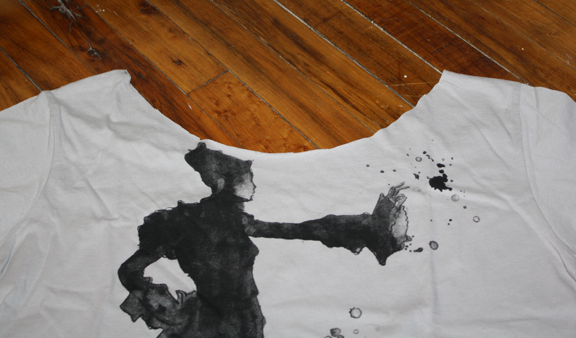
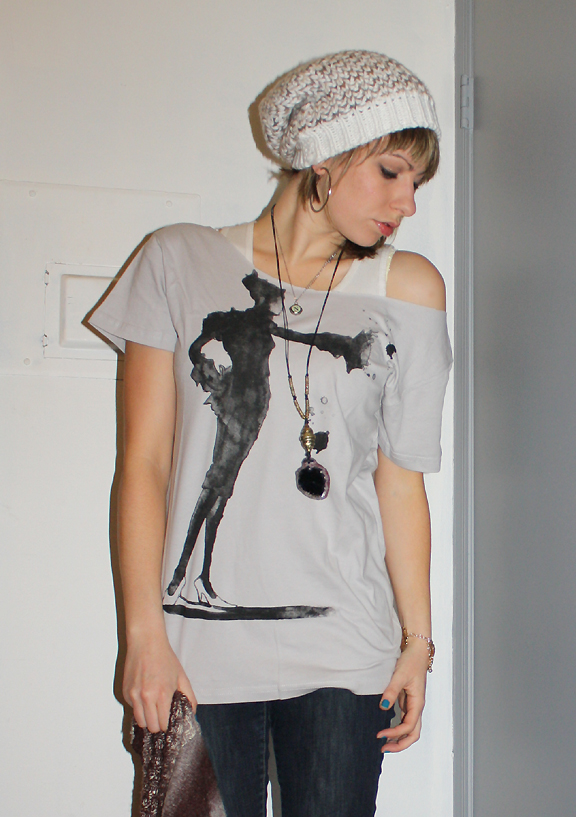
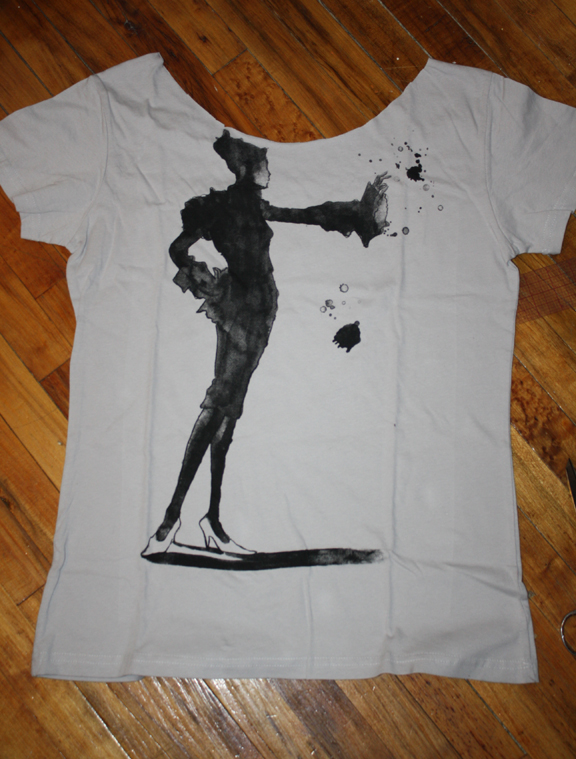
And voila! Bestowed upon you is the finished product...a DIY, authentic, one of a kind Garrott Tee.
Now get your scissors, get your cut on, and show me your creativity!
How you wear your DIY tee is up to you...I prefer to keep it casual.
Since it was a typical day, being more daring was not called for, therefore I went with a wifebeater underneath.
However, on the weekends, I've been known to go sans tank underneath. Sometimes I like to take risks and show a little more than the 'rents would prefer. But hey...when you're an adult you can do what you like, right?
And uh, yeah...."I'm an adult" so I'll wear what I please, and wear it as I want.
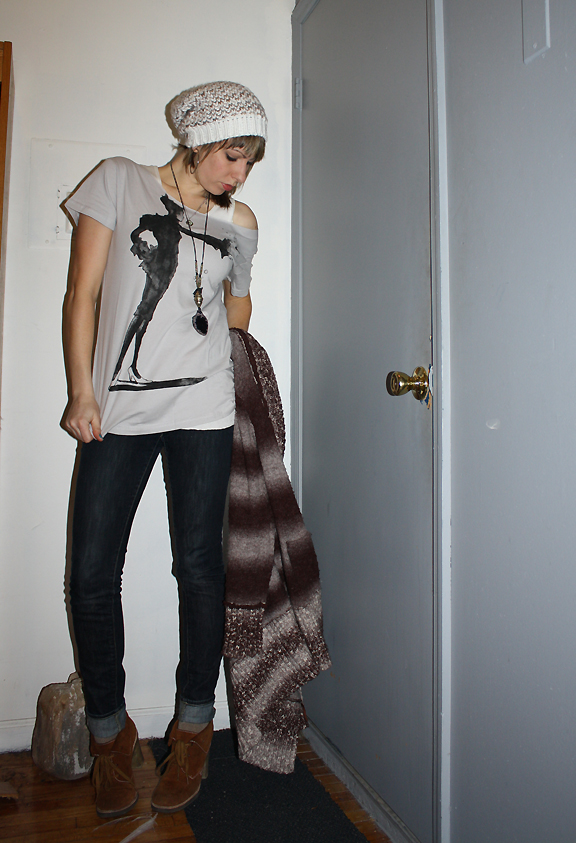
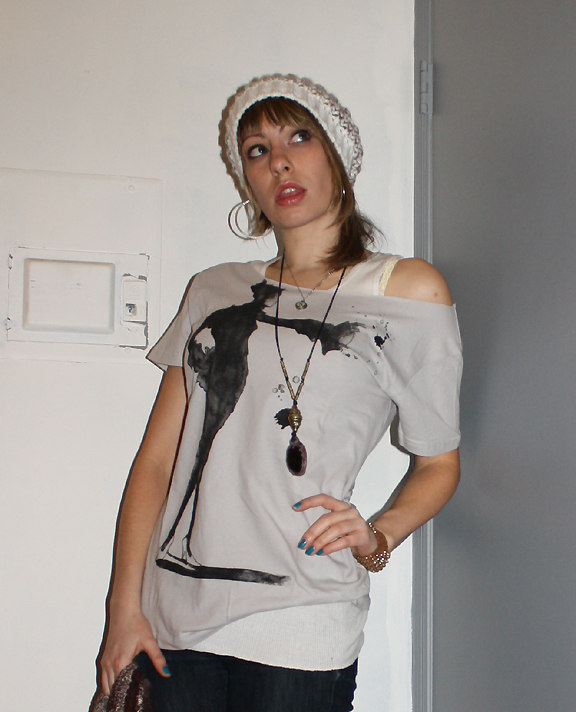
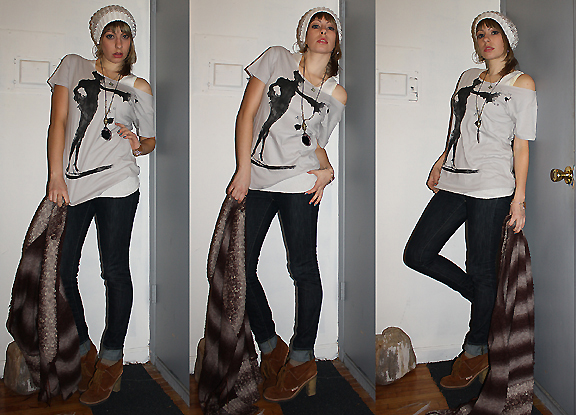
Wearing:
*Gray"Without My Muse Tee" w/DIY detail(s)-Garrott Designs
*White tank-Hanes
*White knit hat-Urban Oufitters
*Skinny Jeans-Uniqlo
*Brown sweater/cardigan-Alberto Makali
*Brown suede shoes-See by Chloe
*Earrings and Necklace-Forever 21
*Leather bracelet-H&M
Stay tuned...this is NOT the end of my Garrott Tee altering adventures.
Oh no...I plan to cut this up a few more times, its a work in progress.
-And I'll be sure to tell you just how to go about cutting it yourself; you know...so if you ever feel inclined you can show me just how you got "crazy" with the scissors!
6 comments:
Love seeing your shears, french curve, and ruler..I have all the same ones :)
You rock that look, love the shoes!
Marie @ Lemondrop ViNtAge
i love off-the-shoulder it's a sexy look! nice diy! i love my raglan from amer app that is off-the-shoulder.
Cuttte! I'm gonna have to give this a shot!
-Meagan
http://spunkychateau.blogspot.com
i love how something as simple as removing the neckline on a t-shirt can change the look completely. great idea!
i have recently kinda gotten into DIY but just dont get around to it most of the time. :P super cute!
www.wakingupinwaco.blogspot.com
Post a Comment